Sign-in to ZOOM.
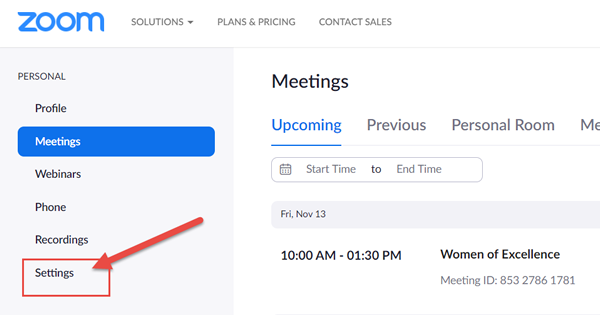
Please visit Zoom.us and Sign-in. Then Select Settings as shown below
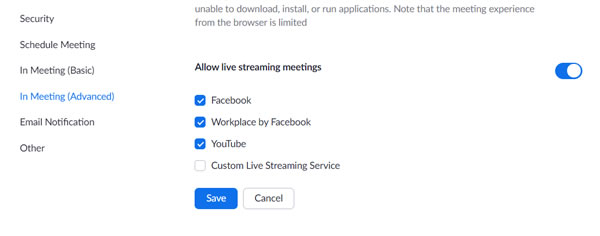
Select In Meeting Advanced and scroll down to Allow for Streaming Meetings. You will see the default settings.
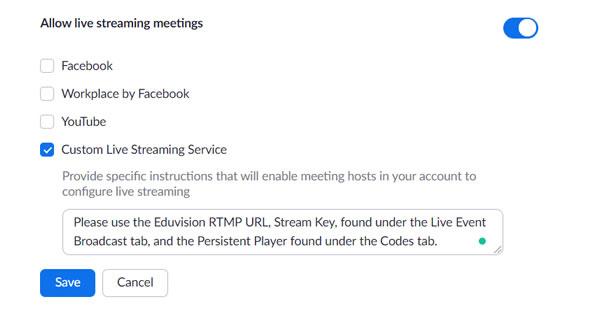
Change the default settings to select Custom and add the language in the “specific instructions” as follows. “Please use the Eduvision RTMP URL, Stream Key, found under the Live Event Broadcast tab, and the Persistent Player found under the Codes tab.”
Then schedule your Event in Eduvision by signing-in and under Live Event Management to Create Event.
These next steps are more manageable if you have a tab open for Eduvision so you can cut and paste the values to Zoom.
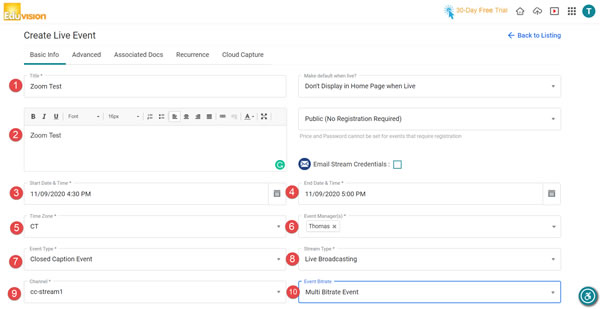
Set your Advanced features, associate documents, and recurrence as prompted to Cloud Capture, as shown below.low.
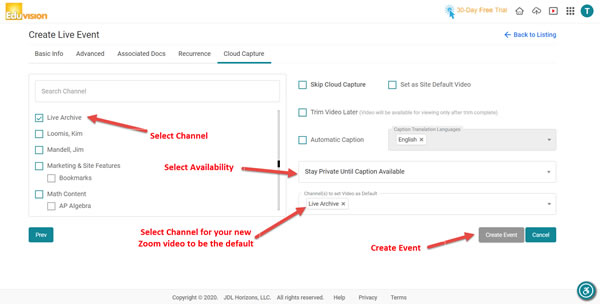
Your Event Broadcast Page will now look for the video stream.
Please start your Zoom Meeting.
From the Zoom Control Bar, select the three-dot-icon and then select “Live on Custom Live Streaming Service,” as shown below.
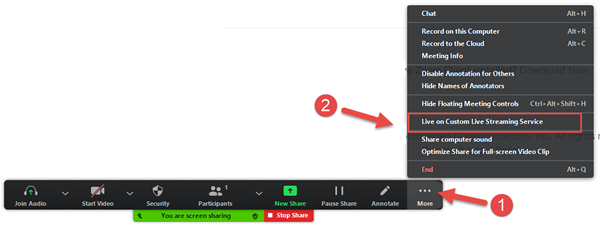
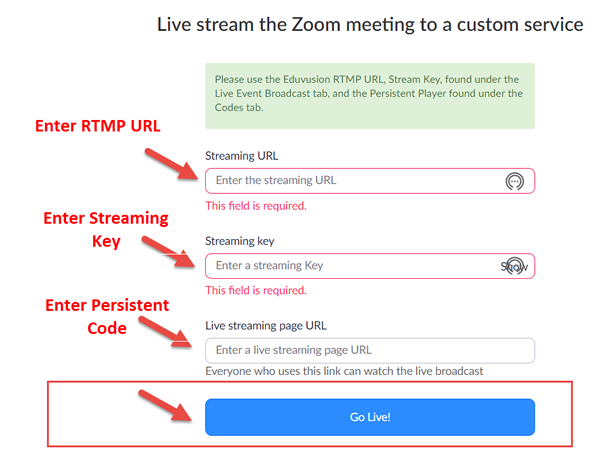
The following will appear after selecting the Live on Custom Live Streaming Service.
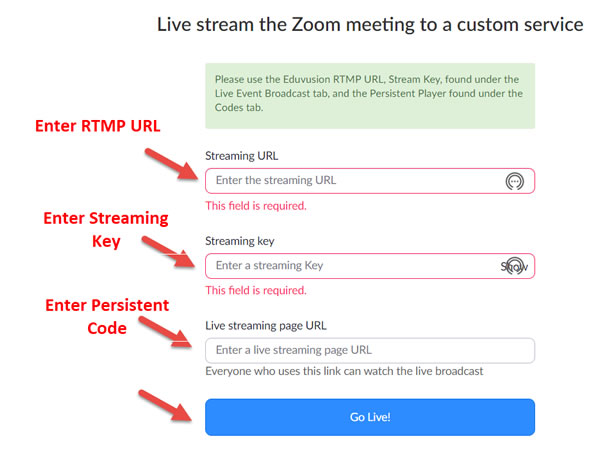
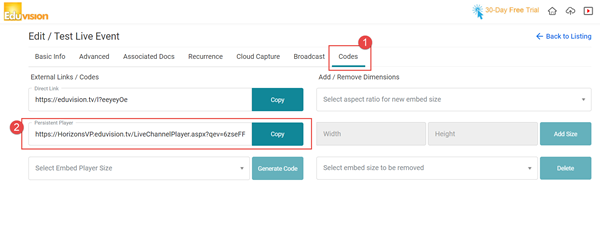
You will get the Information for these entries from the Eduvision Live Event Broadcast and Code Tab.
These settings are found, as shown below. Please use the settings from your portal!
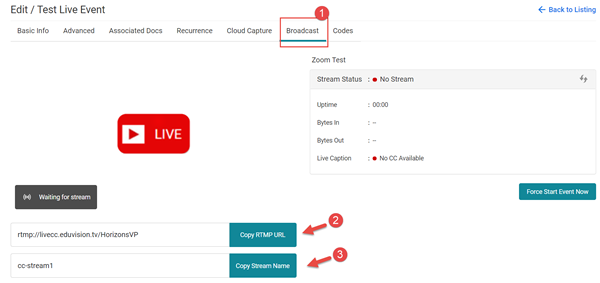
After entering these values in the Zoom Overlay, select Go Live
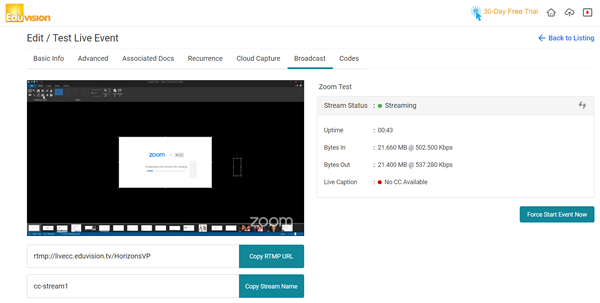
You can check back to Eduvision to see your Zoom meeting live in your Broadcast page tab.
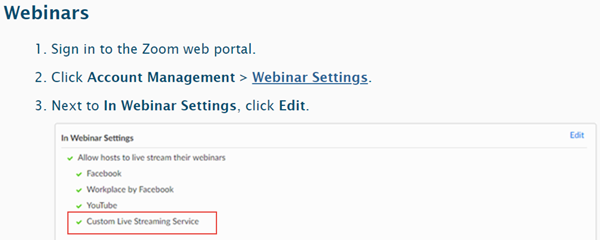
For Zoom Webinar, the set-up is slightly different. Please see
Scroll down to Webinars, as shown below, and follow the process.
Please note that your Zoom meeting streamed through Eduvision can include Open or Moderated Chat and Live Captions and can also be captured and placed into your selected channel and management and control.
WANT SOME PERSONALIZED HELP?
You may contact us for personalized support at support@jdlhorizons.com.
We can also assist you with phone and web-meeting support.
